Are you thinking about building a career online? Or eager to start an online presence with a business plan and want to gather information on how to create a WordPress website? So, first of all, I would like to say that you are on the right track. Today many people start their online presence through a website/blog and choose the WordPress website as the first choice to earn money online.
So, If you are firm on your decision then starting a website with WordPress is really a good idea. Because it is easy to use, and the most secure as well as reliable CMS (Content Management System) software.
In this article, I will show you how to create a WordPress website using easy methods that do not require any special technical knowledge at all. So, stay with this article and learn how to build a WordPress website for beginners.
Table of Contents
What is WordPress? a brief introduction
WordPress is open-source software that manages your website on the Internet and is also known as CMS (Content Management System). It is the most useful content management tool which makes it easy to use for individuals who want to build a website without any coding knowledge. According to web technology surveys, more than 43% of all live websites running on the Internet are built using WordPress. One special thing about this is that there is no need to pay any cost to use it. Anyone who wants to create a website of their own can install and use it for free.
But, before getting started with WordPress, you should know a few things about WordPress. Why I am telling you this because there are two different types of WordPress platforms i.e. WordPress.com and WordPress.org and both are completely free to use. That’s why many people get confused about both CMS.
Which WordPress platform should choose to create a WordPress website?
Actually, WordPress.com is good for those who are beginners and want to learn or practice WordPress. But it is absolutely not a good option for those people who have a business plan and want to earn money from a website/blog. If you want to do blogging personally or just for a hobby then you can go with WordPress.com.
WordPress.org, on the other hand, is a self-hosted version where you can control almost everything you want with your site. You can also extend the features of your site as per the requirements by using advanced plugins. So, I personally recommend wordpress.org if you want to become a professional blogger and make money from it.
Read Also
8 Best legitimate ways to make money online for beginners
Why should choose Hostinger?
When it comes to building a website/blog, choosing the right web hosting service is one of the most important steps. Web hosting is one of the most important aspects of a successful website. With good quality hosting, you get a faster website loading speed which helps in getting better results in SERP.
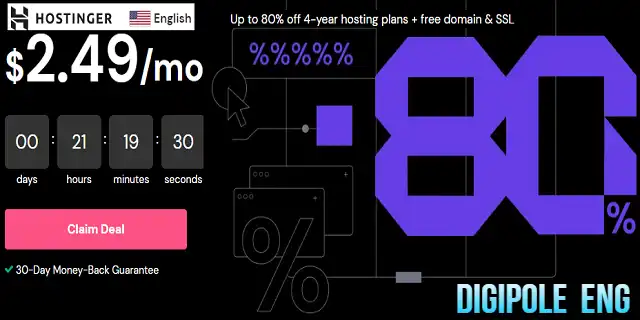
A reliable web hosting also ensures the security of your site and keeps your website safe from hacking and malicious attacks. Although there are many web hosting service providers in the market, who promise better service even at low cost, but they are often cheaters. So I always recommend my followers to go with Hostinger as it is a great option for quality web hosting.
What’s makes Hostinger a good quality web hosting?
- Good uptime and speed
- Less cost
- SEO optimized
- Free Domain & SSL
- High speed(99.99 % uptime)
- Optimized for WordPress
- Free weekly backups
- SSD storage
- Host up to 100 websites with a single plan
- Free email service with 1 GB email storage
- 24*7 Support
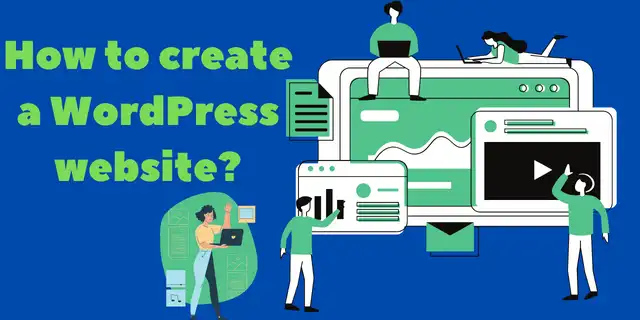
How to create a WordPress website?
When you get started building a WordPress website, you might feel a little uneasy. You might not understand well, where to start with this. But, don’t worry at all because, by the end of this article, you will know about everything from the installation of WordPress to the first blog post. So, let’s go ahead and learn step-by-step how to create a website on WordPress.
Here is how to make a website on WordPress:
- Step: Choose your brand name and register it as a domain name
A domain name is like your home address. A custom domain name helps with your business branding as well as helping visitors find your website easily. A memorable domain name also helps your website to be remembered and get higher organic traffic.

What should keep in mind while registering a domain name?
- When finding the right domain, be sure to consider the following tips.
- Choose a domain that is short, meaningful, clear to read, and also avoids the possibility of misspellings for visitors.
- Use familiar words that help visitors remember them.
- Use a domain checker tool like Registration Data Lookup Tool to check domain name availability.
- Always try to choose Top-Level Domain (TLD) extensions like (.com, .in, .net), etc.
However, different top-level domains (TLDs) have different prices. Domains can be registered with Hostinger. And if you want, you can also register a domain with another domain register portal like GoDaddy. To know more about domain What is a domain? Must read this article.
Read Also
How to earn money from Facebook? 10 best ideas
2. Step:- Choose Hostinger as your hosting and create your account on it
In this article, I am focusing on Hostinger and describing how to create a website in an easy way with Hostinger. However, apart from this, if you want, you can also use Blue Host’s shared hosting. Both these hosting companies are considered to be of good quality, both are almost the same in features, and it’s recommended by WordPress itself.
To publish your website online through Hostinger, you need to create an account on it. For that, simply enter your email address in the box provided and create an account instantly.
3. Step:- Choose your hosting plan
There are different hosting plans for each type of website. For example, if you are making a big plan with your website or you want to run an online store that requires more storage, then you will have to choose the business plan for which you will have to pay more.
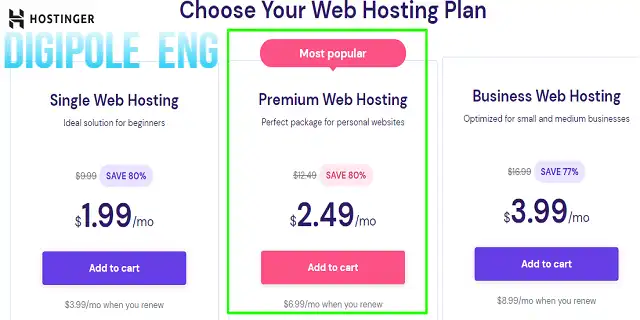
If you want to run a medium-level blog/website like me and want to earn money online through Google Adsense or Affiliate Marketing, then hostinger’s premium shared hosting plan will be the best plan, which is only $2.49/mo (₹ 129 / mo) for now.
Note:- While choosing a hosting plan, try to choose a longer term. A short-term plan is more expensive than average. If you are serious about your blog/website and want to keep it running for a long time then choosing the 48 months plan would be a good option.
4. Step:- Choose your mode of payment
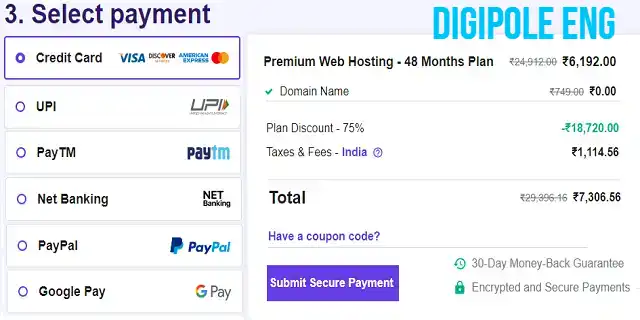
After choosing the hosting plan, now your next step is to choose the payment method. You get many payment options on Hostinger, such as Credit card, Debit card, UPI, Net banking, etc. You can choose any one of them which is more useful for you.
5. Step:- Log in to your hosting account
Once you made complete the purchase, a dedicated dashboard will open in front of you from where you can do all the server-related work. Now whenever you log in to your Hostinger Cpanel (hostinger call it hpanel), you will see your Account will asking for verification that provides security for your hosting account from being hacked if anyone tried to do so. For this, put the Authentication code in the given box that has been sent to your E-Mail box, and click on the verify button, the dashboard of Hostinger will appear in front of you.
6. Step:- Connect your domain to hostinger
The first thing you need to do after logging into the Hostinger dashboard is to connect your domain to the hosting and create a database which is the hostinger’s auto-process system. However, if you register your domain on Hostinger’s platform, then your domain will be auto-connected with your hosting.
But if you register your domain elsewhere, then you will have to do this work manually. For example, suppose you have registered your domain on Godaddy, then you will have to replace Godaddy’s Name Server with Hostinger’s Name Server.
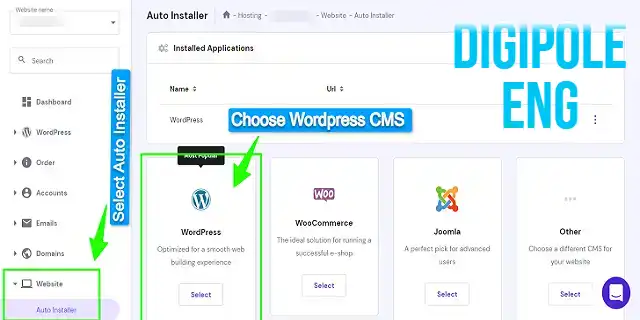
7. Step:- Select WordPress as your platform
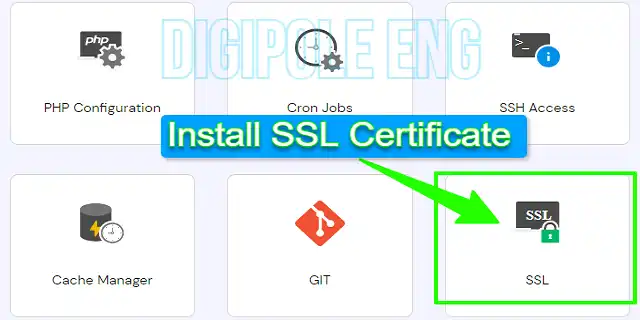
8. Step:- Install lifetime SSL Certificate
Read Also
10 best free WordPress plugins that you must have
How to start working with WordPress?
Till now you have come to know the first part of how to create a website on WordPress, including domain registry, buying hosting, activating SSL, WordPress auto installation, etc. Now let’s understand how to run your blog on WordPress.
1. Step:- Log in to your WordPress dashboard
To start working with WordPress, you must first log in to it. After logging in, the WordPress dashboard will appear in front of you from where you can start working on your website.
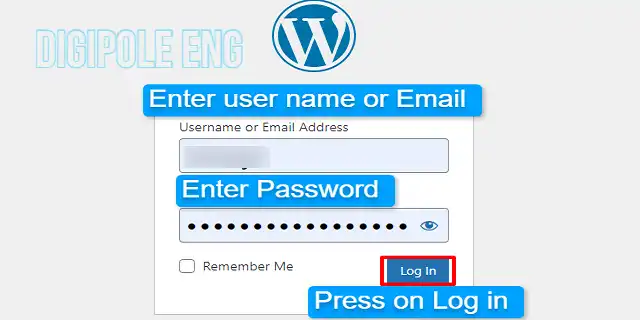
But, for this first, you need to be well acquainted with the WordPress dashboard. Because going forward, whatever you want to do with your website, you will have to do it through this dashboard only. Such as site optimization, creating blog posts, creating pages, adding plugins, adding themes, and many more.
When the WordPress dashboard will appear in front of you for the first time, you will see many options on the left side of it and from there you will be able to manage your entire website. As I said, at first you may have some difficulty understanding it properly. But once you get used to it, it will come easy to you.
2. Step:- Install Theme
A theme is the design of your website that defines how it looks to your visitors. This includes your home page, site navigation, action buttons, site color, display fonts, and many other actions.
To install a theme, click on Appearance > Theme > Select > Activate
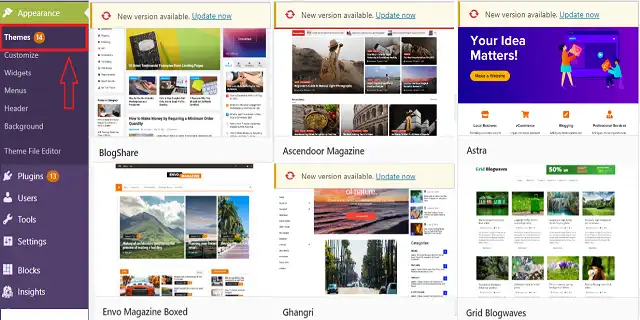
Note:- Choose a theme that is lightweight, simple, and easy to navigate for the visitors. Make sure it is well SEO optimized as well as mobile responsive. There are many such themes available on WordPress for free. You can choose any one of them according to your criteria. On the other, you can also buy a theme for more advanced features.
3. Step:- Customize the theme
Choosing a theme is an essential step in building a WordPress website. Because your theme reflects how your site looks to your visitors as well as how easy it is for them to navigate.
However, WordPress is a flexible CMS software, which provides many ways to customize your theme according to your needs. And you don’t need any coding experience to customize them.
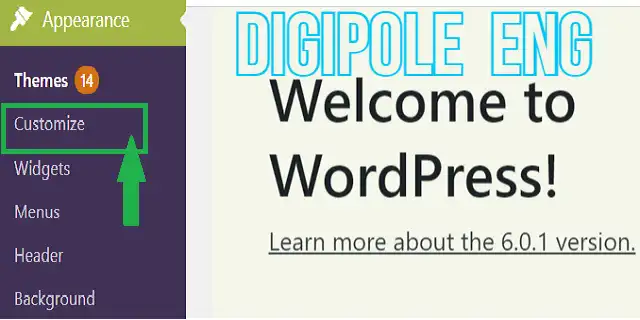
WordPress provides you the facility to edit them directly through its Customize option. To customize your theme through the WordPress dashboard, you need to click on Appearance > Customize, then a customizer panel will open in front of you along with a preview of the changes.
4. Step:- Install required plugins
WordPress is one such CMS platform that is highly flexible and offers many customization options. It has a wide variety of plugin directories that allow you to extend the functionality of your website to a higher level.
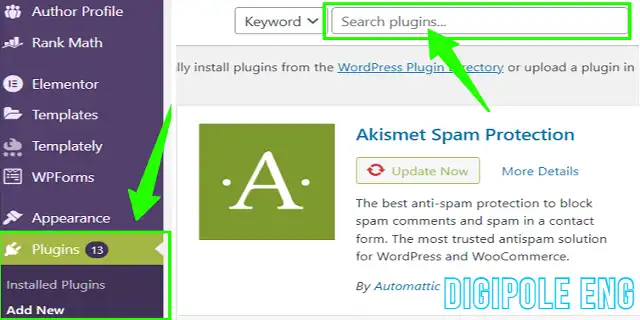
Actually, plugins provide additional features to your website. It powers to create custom contact forms, newsletters, caching, security, and many other functionalities for your WordPress website. Thus an SEO plugin helps your website to get a higher rank in SERP (Search Engine Result Page).
To install a WordPress plugin, log in to your WordPress dashboard and click on Plugins > Add New. Now a plugin window will open in front of you with a search bar. To find a plugin, you need to enter the name of the desired plugin on the search bar.
5. Step:- Complete the necessary settings
After completing all the above tasks, now some important configuration needs to be set. When you click on the setting option, you will see some sub-options such as General, Writing, Reading, Discussion, Media, and finally permalinks.
- General:- In this, settings like Site Title, Tagline, WordPress URL, Site URL, Administrator’s E-mail, Membership Registration, New User Role, Site Language, Time Zone, etc. can be set according to you.
- Writing:- This setting is related to the category of the post and the format of the post.
- Reading:- This setting section is related to the front page of the site or your home page. You can set your home page here. Also, you can set how many posts you want to appear on each page. Also, you can decide whether it should be shown as full text or a summary, and The most important option is to discourage search engines from indexing the website.
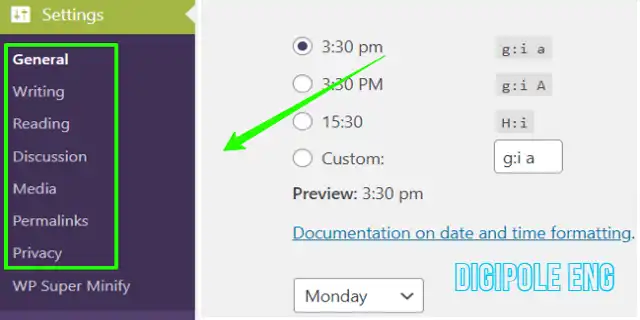
Note:- Never click this option if you want to allow search engines to index your pages and view them publicly.
- Discussion:– With this setting option you can set whether it allows people to link posts with other blogs as references, settings comments, e-mail notifications for new comments, and comment moderation.
- Media:– This includes settings related to the upload and management of media on and off WordPress. Things like image size and cropping options can be managed here.
- Permalinks:- This setting is related to the structure of the URL. These settings make it easier for users to find and remember the post’s URL. Additionally, this setting allows you to control whether you want to show dates in your URLs, only titles and categories, or a combination of both.
6. Step:- Create the required page
You should know that every website needs to have some essential pages to be published online. Let us take a look at some of the important pages that you should use on your WordPress site.
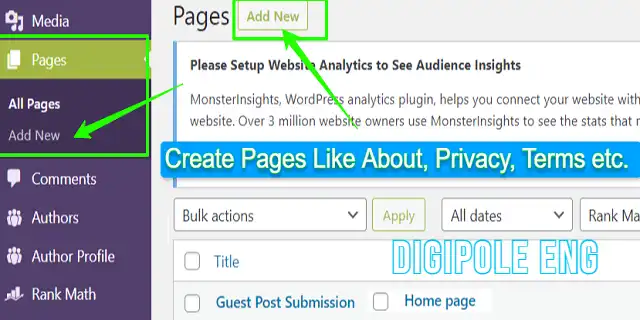
- About Page:- This is a common page for almost every website running on the Internet. Somewhere it is used as “About Us” or somewhere as “About Me”. It really depends on what type of blog you are going to run, a business blog or a personal blog. This page is basically used to inform the users about the person behind the website and its objectives, as well as what users should expect from your blog.
- Contact page:- It is important to have a contact page on your blog because there may be some of your readers who are interested in your business and may try to contact you or establish a relationship with your business. So, a contact page helps users to connect easily without leaving any public comments on your blog.
- Privacy Policy:- The privacy Policy page is an essential page for all types of websites, especially for those websites which provide any service or sell products. Basically, it informs users about the data you collect on your website as well as how other third parties use that data. Even if you are not collecting any data from users, the third-party tools on your website, such as Google Analytics or Google AdSense, may use cookies to collect data on users’ behavior on your site. The policy page is required by European Union (EU) law to protect users’ data and privacy. To comply with the General Data Protection Regulation (GDPR), it is necessary to have a privacy policy page on your site.
- Terms and Conditions Page:- Terms and Conditions, also known as Terms of Service Agreement. Although it is not directly a legal requirement for a website like a privacy policy, it cannot be ignored just for this reason. Having a terms and conditions page on your website provides a clear outline for the user that it is safe to visit the website for the user.
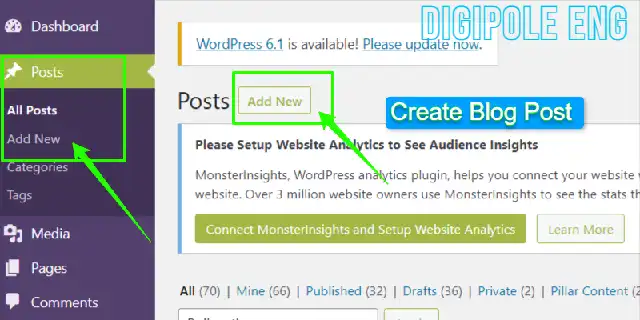
7. Step:- Create your first blog post
Articles or blog posts are the main assets to keep a website alive on the internet. It helps in increasing the visibility of your website on the internet and invites more organic traffic to your website. For any online business, a blog post engages customers and increases the credibility of your service. Creating blog posts regularly keeps your site up-to-date as well as providing valuable content for your readers.
8. Step:- Publish your article for public
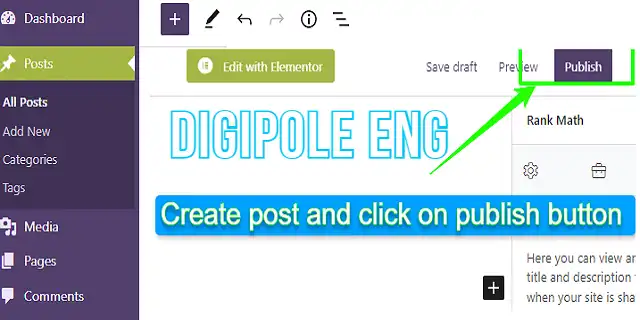
After creating a valuable blog post, now the time is to publish your post to the public. Optimize your post to get a better SEO (Search Engine Optimization) result as well as to get a better rank on the search engine. Now to publish your post, click on the publish button given on the top right.
Read Also
15 Best Affiliate Marketing Platforms in India
Final thoughts on how to make a website using WordPress
So, this is how to make a website on WordPress. Here in this article, I have tried my best to make you understand better how to create a WordPress website. In this article, I have told you the easiest ways to create a WordPress website.
I hope, now you have a good understanding of how to create a website with WordPress as a beginner and you can also create your first WordPress website by following this article. Still, if you find any mistake while making it, please feel free to contact me. I will do my best to help you.
To get more such valuable articles please subscribe to my website and also share this article with your friends.
FAQs
What are the Key Features of WordPress?
WordPress is open-source CMS software.
It’s completely free to use.
WordPress is easy to use, especially for beginners.
WordPress is more optimized for SEO.
WordPress supports almost all types of media.
It’s more secure.
What are the basic requirements to build a WordPress website?
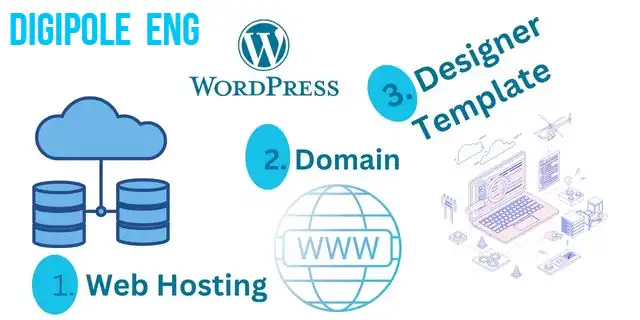
Before Knowing how to build a WordPress website, let’s take a look at the things that are needed to make it.
1. WordPress CMS
2. Web Hosting
3. Domain Name
4. Theme/Template
How to choose a good hosting plan?
Though WordPress is a free CMS software and you don’t need to spend any amount to install it. As I mentioned earlier it is a self-hosted content management system, so you need to host your website over the internet on your own. A web hosting plan will be required for this and you will need to invest a small amount on it.
Most of the new bloggers get confused while choosing a good hosting plan. But I always recommend Hostinger to my followers. Which is perfect for beginners who are going to start their first blog. Because it is a high-performing hosting plan and low in cost. For detailed information about web hosting, read the article ‘What is web hosting? How to buy it? Hosting types.’
- What is a Compiler?Difference between Compiler/Interpreter - November 27, 2023
- What is system software? How it works and its types - November 26, 2023
- Why website does not rank despite good SEO? - November 25, 2023

